

Agro-ecology &
How to grow Plants
AGRO-ECOLOGY
Agro - growing and producing food. Ecology - interaction of organisms with their environment.
Agro-Ecology is way of looking at local ecology to develop a system of growing food that works optimally for the community. This approach allows communities to make a truly global impact by acting locally. The way Agro-Ecology is implemented locally will be unique for each area and environment based on the local ecology and the needs of each community.
Here we identify and share tested holistic practices which aim to bring benefit to the entire local ecology (soil health, growing plants, carbon sequestration, healthy water systems). We offer a growing list of practices that anyone can use for themselves and others in the community to bring benefit and balance to their lives. (seed savings, home apothecary, herbal preparations, sprouting and micro-greens, clean water, water conservation)
Growing Plants
Growing plants is a very rewarding experience and accessible to nearly anyone at any age. With just a few materials and some seeds you can grow some of your favorite herbs at home. Where many of the basics are fairly simple, seed-growing these plants is an enjoyable exploration. Things are bound to go wrong at times even for the best growers, but see these as opportunities to gain additional understandings about the working of nature, as these can be valuable learning experiences.
Getting Started with Soil
When getting ready to start growing plants one of the first things to place focus around is preparing an inviting area for growing your plants. The soil should be soft, well nourished, containing organic matter, drain well and have a balanced pH. For the plant to fully thrive, it is important to give the plant the best start possible.
Once the soil is ready, the focus turns to which type of plant you want to grow. Most annuals and many herbs are easy to grow from seed. Additionally, growing plants from seed has a cost advantage as they cost less than buying a started plant, and there are far more varieties of seeds available than the selection for started plants. Many growers start many of their seeds indoors. This protects the seeds from birds, slugs, and all sorts of unfavorable weather conditions. It is good to ensure that when growing seeds they have free draining soil; this favorable growing medium will help reduce the likelihood that the young roots will become to wet, rot and die, a condition known as damping-off.
Choosing a Container
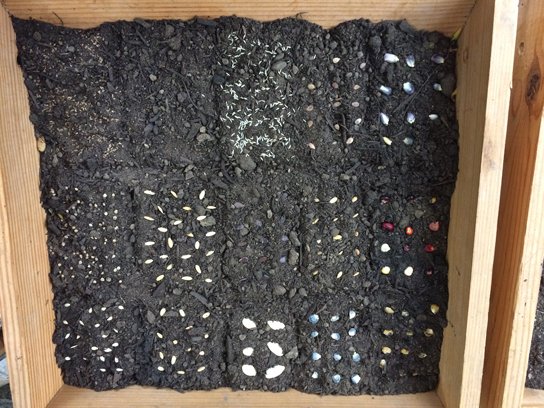
The containers used for growing the seeds can be anything you might have available for use. Old pots or growing flats work, as well as cleaned milk cartons with holes in the bottoms, or used toilet paper roles on top of egg creates with holes punched in the bottoms. The soil should be at least 2-3 inches deep so that it does not dry out too quickly, so it is for this reason that just using egg cartons may not be a successful option. The individual seed will likely have planting instruction printed on the package in which it was purchased. As a general rule however, seeds are often planted 1/4 inch below the surface, or for larger seeds they can be planted to the depth in the soil that the seed is high, when lying on its side. The seeds should be spaced well enough apart (3-6 inches) so that they will be able to be easily transplant into a larger container, if they are originally started in a container without individual cells. If the container has individual cells, than only one seed should be placed in each cell.
Ideal Places for Growing
Once the seeds are in the soil it is good to place them somewhere comfortably warm. There are commercial heating pads sold specifically for this if you are unable to find an ideal location. Some spaces which work well for many individuals are on top of refrigerators, or in window sills which are south facing, as long as there is not an extended overhang blocking heat and light from coming into the window.
After the seeds are in the soil and the location is decided, identify if there is a good lighting source for the growing plants. Usually, plants grown in a well lit windowsill will get adequate light. If growing is done inside on a countertop, additional lighting can be supplied with a fluorescent grow light or a spectrum specific LED. With regular lighting and water sufficient to keep the seeds moist, they should begin to grow up in their container. If numerous seeds were germinated in close proximity, this is a good time to do a little thinning to make sure the plants have room to grow, and there is enough room around them to allow for light and air to move around their leaves.
When to Transplant
The two main times when plants are being transplanted is when sprouting seeds become too close to other seedlings, or when the size of the plant and its potential growth are being restricted by the size of the container in which it is growing. When a seedling is being transplanted it is good to wait until it has at least developed its first set of true leaves. The first set of seed leaves (cotyledons) will likely look different from the appearance of the leaves on the mature plant. Once the first set of true leaves have appeared, the plant will likely be stable enough and will have the beginning of a developed root system. Be careful not to dislodge any of the soil from the young roots, because at this stage it can dry out easily without soil contact, and packing soil back around the roots can be difficult without damaging the roots in the process.
If the plant has reached the full capacity of its container that is often a sign that the plant is happy with its growing conditions. At this time note what you are doingright to help the plant grow. If the roots are only coming to the edge of the soil, it may not even need to be replanted, but if you would like to anyway, use the transplant method described above. What is often seen when a plant is transplanted is a series of roots tightly woven around on the inside of the pot, crossing over each other and twisting in circles. This is potentially a hazard. It is a good opportunity when you are transplanting to work to correct any problems before they develop. In nature, plants send their roots out in every direction to pull in as much water and nutrients as possible, and end up looking like the spokes in a wheel. If the roots keep growing in a container, but can’t move out, they will often just keep going around and around. This pattern of root growth can be the sign of over watering, and if not addressed, in time, can lead to the plant constricting its own roots and actually choking itself to death.
Transplanting
Transplanting a healthy plant is an important step that may come up with plants as they grow in size and quantity. Transplanting an indoor plant into another container which will remain indoors can be done at about any time. Transplanting an indoor plant to out of doors should be a gradual process, which stretches out over a week or two. When moving a plant outside, you are gradually acclimating the plant to the different temperature, humidity, and air movements. To make this transition easier for the plant, make this change in steps by taking the plant out into a shaded area and leaving it outside for longer and longer periods each day, until it is able to be left outside for an entire night.
To transplant a plant turn the container over so that the plant slides out. Take care not to drop the plant in this process. Place one hand so that it covers the soil at the base of the plant, while allowing the stem of the plant to extend out between your thumb and finger as you let the plant slide out. If it does not initially fall out, the container can be gently shaken or tapped on the bottom. Once the plant is out, replant it into another prepared container or a prepared hole in the ground. Once the plant is in the soil, it should be lightly patted in, so that it is in firm contact with soil on each side and that the soil level at which the plant is sitting remains the same as it was before it was transplanted. When it is all settled in, give the plant a nice watering, keeping it a little moist over the next few days while it acclimates to its new living arrangement. Like with the initial planting the soil in the ground or container should be soft, fertile, well draining, and not too soggy.
Dealing with Spiraled Tangled Roots
When the plant is displaying a spiral of tangled roots, try to untangle the roots so they can move more radially out from the stem. If the roots are just too tangled, or have fused together and are unable to be freed, some of the roots can be cut back. When doing this it is advised to cut as little as possible, while recognizing that this cutting is actually allowing for the plant to grow more. When making the cut always be careful to cut away from yourself. Using a sharp cutting tool, start cutting at the ends of the roots so as to cut as little as is needed until the roots are able to be pulled open. If the root mass is too compacted, the knife can be used to slice vertically down the sides of the root ball at two to four places around the circumference of the root ball. After the cuts have been made, gently wiggle the sides so that the root ball loosens up a little, and pull away any cut and disconnected pieces of root. At this point you can transplant the plant into an awaiting hole or container, gently patted down, and water well.
Additional resources
Book:
Creasy, Rosalind ‘Edible Landscaping’
How to set up indoor garden operations
General Supplies: